- Shop
- Bikes / Frames
-
Components
- Tires / Tubes / Sealant / Valves
- Forks / Parts
- Rear Shocks / Parts
- Groupsets / Drivetrain Bundles
- Drivetrain
- Shifters
- Handlebars / Grips
- Stems
- Brakes / Pads / Adaptors
- Seatposts / Clamps / Levers
- Saddles / Seats
- Pedals / Cleats / Parts
- Wheels / Hubs / Rims
- Headsets / Parts
- Cables / Housing
-
Accessories
- Tools / Lube / Solvents
- Car / Truck Racks / Tailgate Pads
- Frame Straps
- Pumps / Inflation
- Chainstay / Frame Protectors / Fenders
- Computers / GPS / Electronics
- Hydration Packs / Bags
- Lights
- Water Bottles / Cages
- Gift Ideas / Novelties
- Indoor Trainers
- Bike Travel / Shipping Cases
- Nutritionals
- Locks
- Storage Racks / Stands
-
Apparel
- Helmets
- Jerseys
- Shorts / Bibs
- Gloves
- Shoes / Socks
- Pads / Protective Gear
- Pants
- Eyewear
- Chamois / Short Liners / Base Layer
- Chamois Creams / Embrocations / Butt'r
- Jackets / Vests / Hoodies / Flannels
- Casual Wear
- Headwear
- Brands
- Top Secret Sales (Do Not Tell!)
- Watch
- Read
- My Account
- Help / FAQ's
- Contact Us / Locations
- Call Us | 1-805-375-4525
- Why Shop With Us?
- About Us
- Continue Shopping
- Your Cart is Empty
OneUp Components V2 Dropper Post [Rider Review]
Our "Rider Review" article series features the honest reviews from verified purchasers of Worldwide Cyclery. They contain the photos, thoughts, feedback & overall review you are looking for.
Dropper posts are one of the best mountain bike innovations of all time, and OneUp has been making affordable, quality dropper posts for years now. Their V2 post is improved over their previous version in several ways, and our friend Will recently upgraded his Kona with one and has been loving it. Read on for more!
Overview
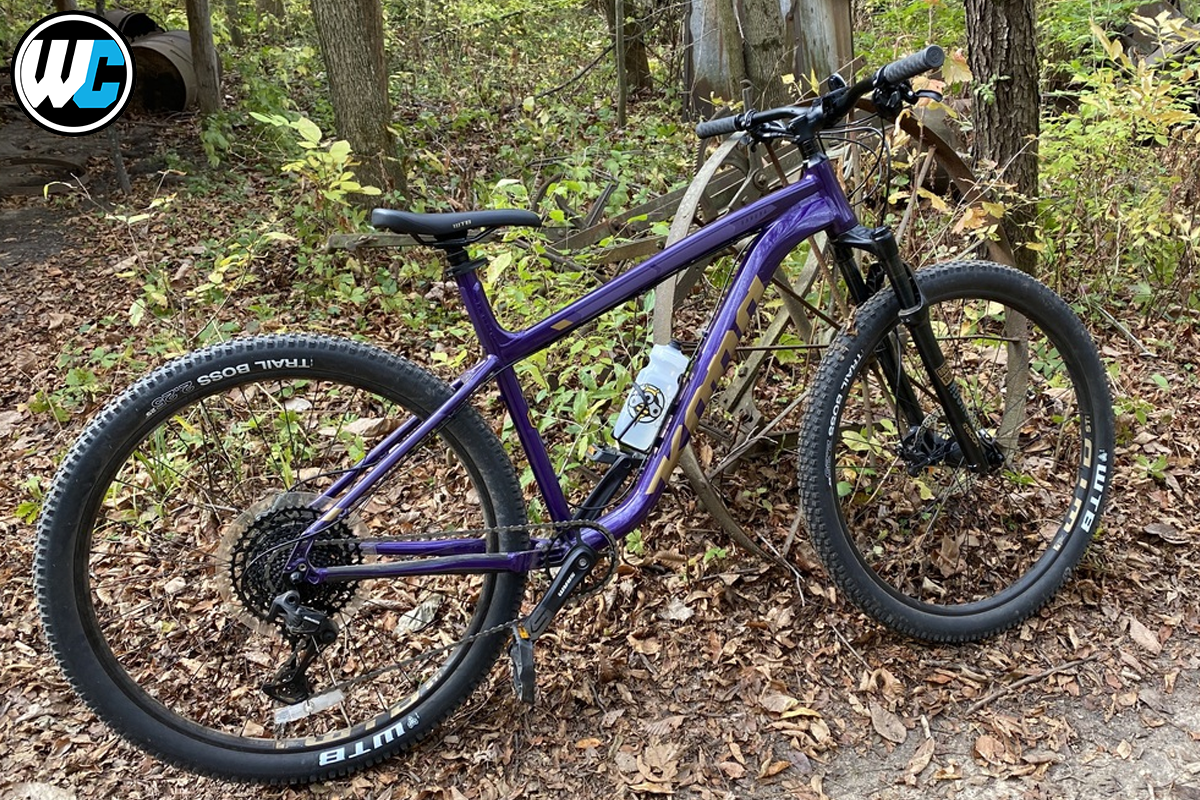
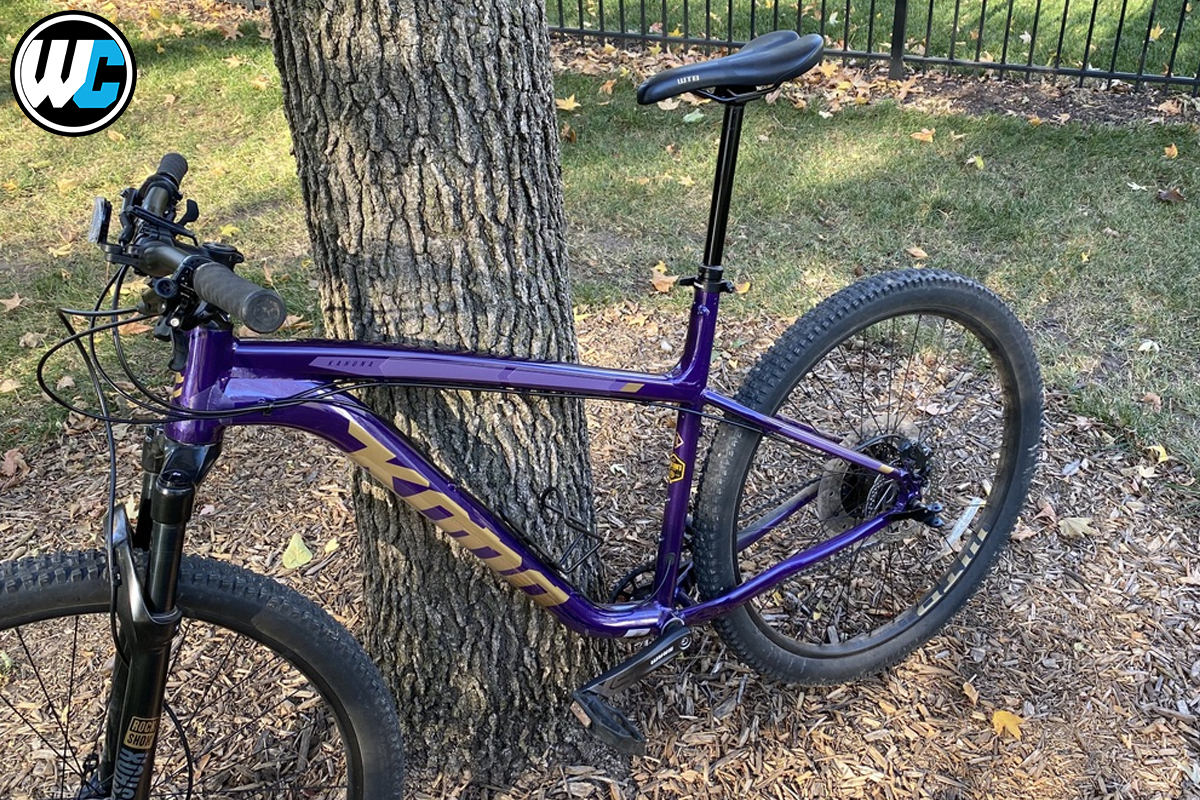
I bought a 2020 Kona Kahuna 29" hardtail this spring, right before all the bikes at my local shop were sold out due to COVID-19. I'm new to mountain biking and therefore have been doing quite a bit of research on what products I should buy to update my new bike. YouTube is my go-to place for research, so it didn't take me long to find Worldwide Cyclery's YouTube channel with all kinds of good product reviews and comparisons.
The list of potential upgrades is endless. My Kona came stock with 160mm front and rear disc brakes, a RockShox 100mm travel front fork, and a SRAM SX drivetrain. It hit most of my must-have list right from the factory, but a dropper post was the next logical upgrade for me and my bike.

I'm 6' 4" tall, so I knew right away I was looking for a dropper that provided me with the most drop possible. There are a lot of good options out there. Bike Yoke Revive, Rockshox Reverb Stealth, and the FOX Racing Shox Transfer Performance Series were all good options based on reviews at gearlab.com, but all of them were more expensive than the OneUp V2 Dropper Post. Furthermore, none of them could offer the 200 mm travel that the OneUp dropper could offer. For about $200, I figured I couldn't go wrong with the OneUp dropper.

Installation was very easy. First, I removed my WTB seat from my old post while it was still installed on my bike. That provided me with a stable platform to hold the seat steady while removing the bolts. Next, it was time to route the cable and housing up through my frame. The underside of the dropper has a nice clamp feature to hold on to my cable, giving me confidence that nothing is going to let loose during riding. In went the dropper and I tightened my seat post clamp to hold it in place. Time to shift my focus to the front of the bike, where I went with a handlebar-mounted OneUp remote lever to match and routed the cable up to the remote. The install instructions were very clear and easy to follow, although I will admit that I did watch a few YouTube videos to make sure that I was doing everything correctly the first time. Total install time was probably about an hour to complete.
Now, with the simple push of a button, I can get my seat out of the way enabling me to shift my weight over the rear wheel when I'm going downhill or rise it up to have the most efficient pedaling position. It really has given me great confidence on the trail and improved my abilities greatly this summer.
Believe what you read online about how much a dropper post will change and improve your riding abilities. I used to get bucked hard on the trail by my seat just being too high because I didn't want to stop and adjust it in the middle of a ride.
Final Thoughts
I would highly recommend adding a dropper post to your bike if you don't already have one, and I'm very happy with my choice: the OneUp V2 Dropper Post.
July 25, 2021
OneUp › OneUp Components › OneUp Dropper Post V2 › Rider Review ›
Top Products For You...
Recent Blogs
--- Shop Info ---
Newsletter Signup -
© 2025 Worldwide Cyclery


